Pages

Tuesday, July 24, 2012

Maui Babymoon & Food Tour

When we've mentioned taking a "babymoon," half the time we get blank looks in response. I guess it's a newer term than we thought. My husband surprised me with a trip to Maui this month to relax, celebrate, and enjoy our life as two before we become three. Our babymoon.

That's right, folks. A little baby Ringler is due to arrive in early November! We're almost 6 months along and I can hardly believe it. Blogging has already started to become difficult to fit in...I'm afraid I might drop off when our son arrives, but hopefully his coming into our lives will inspire me even more as a new mom trying to feed healthy and creative foods to a growing boy. We'll see!

For now, though, I had to post about this trip because of all the great places we discovered on the island of Maui. We were there for a short 5 days, but it did not disappoint. Along with the relaxed nature and beauty of paradise, the food there was amazing and I can't wait to go back. Here's where we ate and ate and ate...

Da Kitchen Cafe in Kahului Home cooking, island style, perfect for your first meal when you fly in to the airport (it's only 2 minutes away) and when you fly out! You will find Hawaiian plate lunches and more. But all I really wanted was Loco Moco: rice, hamburger patty and a fried egg topped with a lot of brown gravy. It was amazing. The husband had Kahlua Pork with brown rice. The pork was a little too salty, but the rice was really good - soft and sticky - surprising for a whole grain. We also tried the Chicken Katsu and Teriyaki Beef and Teriyaki Chicken. Those were all excellent. Each dish was enough to feed two people. We enjoyed our leftovers on the plane home!


Kihei Caffe We also ate here twice because we loved it so much. This little "dive" is in Kihei, the town between Wailea and Lahaina on the west coast of the island. You order at the counter and they bring your meal to you outside on the patio. The people that work there are so friendly, it's like coming home for breakfast (or lunch). And you can have breakfast all day - well, at least until 2pm when they close up. They are located across from a beach park, so I'm sure they get a lot of local surfers coming for grub. And is it goooooooood grub! We had the Breakfast Burrito with Chorizo and we also tried the Cinnamon Roll French Toast (with coconut syrup - yum!). Both were fantastic. They have pancakes and pork chop & eggs, and they even serve meusli and yogurt parfaits. It's fresh and the flavors are really wonderful.
Mama's Fish House This is the best-known fine dining restaurant on the island. It's expensive, but you get a great experience for the 4 dollar signs. It's located on the north shore, at a private beach outside of the town of Paia. It is a huge restaurant and you need reservations whether for lunch or dinner, on the weekend or during the week. The fish is caught fresh everyday and the service is excellent. They start by serving fresh baked bread and a tiny taster cup of tomato and ginger bisque. It is a perfect beginning to a meal. The cocktail and wine list are quite extensive as well. We ordered the Shrimp Wontons (whole shrimp wrapped in a wonton wrapper and fried), Pulled Wild Boar and Mahimahi, and the Opakapaka served upcountry style (pan-fried) with carmelized onions and bok choy. For dessert, we had French-pressed coffee and the Black Pearl Lilikoi Chocolate Mousse. Beautiful presentation and taste all around. Our whole dinner came to about $160 for the two of us.


Jawz Fish Taco Truck & Ululani's Shave Ice We met some locals at a happy hour, and they recommended Jawz fish tacos. We found the food truck on the way to Kihei so we decided to stop and give it a try. The fish is grilled and the tomato salsa on top was almost a little creamy. It was very good - but I'm not sure I would go back...maybe just to try something else. If nothing else, it's a cheap way to eat. Two tacos for $7.

Ululani's now has shave ice shops all around the island. With a 5-star rating on Yelp, you can't lose here. It was definitely one of the best authentic Hawaiian shave ices I've tried. It's super soft and finely shaved ice, with just the right amount of syrup. The ice cream and mochi add-ons are so yummy, and the "snow cap" of condensed milk adds a perfect sweet creaminess to the treat. I'm so glad we tried it!

Tommy Bahama & Lappert's Ice Cream & Coffee at the Shops at Wailea
Our favorite stops in Wailea, where we stayed, were the Tommy Bahama Restaurant Happy Hour, and Lappert's Ice Cream. Both are located in the same shopping mall. You may know Tommy Bahama's as a clothing store. Well, it is, but they also have a bar and restaurant! The happy hour was a deal with drinks at $8 and apps at $7-9 each. The prime beef sliders were our favorite, followed by the macadamia encrusted goat cheese. The atmosphere is great, and we met some great new local friends there.

Lappert's is an ice creamery in Kauai, which has stores on the other islands. The ice cream is so rich and creamy, and you get flavors you can only find in Hawaii, with coconut and kona coffee and macadamia shortbread pieces. Delicious.

I'm ready to go again. Maybe next year to celebrate baby's birthday?!? wink, wink.

Thursday, July 12, 2012

Preserving Summer Produce, Part 3: Pesto

Spinach. It comes is big bags or bunches and it is a pretty sturdy green; meaning it lasts a pretty long time in the fridge. But I was headed out of town and wasn't going to chance it over 3 days, so I decided to save it by making a pesto.


First I tried to puree it in my blender. But I failed. Nothing happened. If only I had a Vitamix...


So I transferred everything to my food processor and added pecans. The pecans I store in my freezer to prevent from going rancid. You should store all of your nuts in the freezer if you can. They last a really long time that way.
Then I blended it to a pulp. Literally. I added olive oil and grated parmesan cheese. I should have added a little bit of lemon juice to keep it from turning brown, but I didn't have a lemon. So it turned a little dark green on the top after a day in the fridge.


When I got back from my weekend away, I cooked up some pasta and tossed in the pesto that I stored in a mason jar. It's nutty and fresh and cheesy. It made for a nice easy lunch at home.

Tonight we are enjoying the pesto on a pizza in place of tomato sauce. Bon appetit!


Spinach, Arugula, or Basil Pesto
1 bunch or 4 cups fresh spinach, arugula, or basil, roughly chopped
1/8 cup nuts (I've used pine nuts, pecans, or walnuts), roughly chopped
1/2 cup grated parmesan cheese
1/4 cup olive oil
1tsp lemon juice
Salt & Pepper to taste

Put greens in a food processor or a really powerful blender (mine did not perform for me). Add pecans and blend until well pureed. Then add parmesan cheese, olive oil, and lemon juice. Blend and taste. Add salt & pepper as you like. Store in an air tight container or jar for up to 2 weeks. If you freeze it, it keeps for just about forever.

Sunday, July 1, 2012

Preserving Summer Produce, Part 2: Salsa


If you have peppers and/or tomatoes that need to be used, make salsa! It's easy and pretty quick. I made mine at 9pm and was in bed by 9:30p. I put the peppers on a lined baking sheet whole, and drizzled with olive oil.


They look awful, but that's what gives them a smoky roasted flavor.

Remove the stems of the peppers.

Puree it all in a food processor...


I found that the peppers I used made it a little more bitter than I like. So I added a little sweetness in the form of agave nectar, and a little heat in the form of Tapatio hot sauce. But, you make it how you like it - and depending on what you are using, you may not need either of these at all.
It was easy, fast, and really good with a quesadilla. What a great way to use up all those peppers and tomatoes in one go!
Roasted Pepper and Tomato Salsa
10-12 peppers & tomatoes, any combination
1/2 bunch green onions or 1/2 white or yellow onion (optional)
1 lime, juiced
1-2 cloves garlic (optional)
1T agave nectar or honey (optional)
1T hot sauce (optional)
Olive oil to cover the vegetables, about 4 tablespoons
Salt to taste
Roast the vegetables at 425F for 15-30 minutes - you can turn them half way through the cooking time - until charred on the outside and your house smells like salsa. Let cool for 15-20 minutes, then remove the stems off the peppers. Put everything into a food processor, add lime juice, and blend until smooth. Taste the salsa. Is it bitter? If yes, add a bit of agave or honey. Add Salt to taste. Store in an airtight container or jar.

Tuesday, June 26, 2012

Preserving Summer Produce, Part 1

Yikes, has my life been a little bit hectic! Summer has hit and I feel like I'm going non-stop. We took a short trip to Las Vegas last weekend to celebrate a friend's 30th birthday. But before I left, I had to save all of the CSA produce that I hadn't been able to eat from that week...

So here's a couple of quick tips for two totally separate items: garlic and watermelon. I don't recommend them being used together. But, if you have any brilliant ideas for how they could, let me know.

Storing Fresh Garlic
My mom showed me years ago that if you have a bunch of fresh garlic, you can store it in the fridge if you peel it, put it in a jar, and cover it with white wine. It keeps for weeks, even months, just like that. And you can use it when you need it - it won't mold or lose its flavor. I got three big heads of garlic in my box this week, and there was no way that I'd have been able to use it in time.

Before I started canning, I never had mason jars in the house, but since I have, I use extra jars for all sorts of things. They come in handy more often that I had ever thought! You can find them at hardware stores, like OSH or Ace Hardware.
Got Leftover Watermelon??


I did. A whole half a watermelon. I'm amazed at how many servings you can get out of one of these things. I bought it for a BBQ, had 10 people over, and I still had more than half left.

My nephew used to love watermelon juice when he was little. I'm sure he still enjoys it. Thinking of him, I decided to blend it up into juice, store it in the freezer, and then I'd have it on hand for a refreshing summer drink in the future.


With this one half melon, I got two pints of juice by simply cutting it up, throwing it in the blender and letting 'er rip.

Here's to watermelon mojitos, watermelon margaritas, sparkling watermelon juice spritzers, and all the other watermelon drinks that are to come! (We'll see how far two pints of juice goes.)


There's more to come on preserving produce, so stay tuned. :)

Monday, June 18, 2012

Green & White Pizza


You can't tell from the fuzzy photo, but this was a really tasty pizza. A new creation, I am calling it the Green & White. Everything on it was green or white. If you ever make one, all you need is green and white toppings, and you'll be set.


I had all these onions left over from some Persian take-out food we ordered. They always give us quarters of raw white onions in a paper bag with the plastic utensils and extra sumac seasoning. But, I'm not a huge fan of raw onion, so I saved them for another day. This was the day.


I carmelized them by heating up 2 tablespoons of olive oil and 2 tablespoons of butter, dumping in the sliced onions, sprinkled with salt, and turned the heat on low, letting them cook really slow. Low and slow, baby. They will sweeten up and turn a beautiful golden brown color. Smells so good.


Second white ingredient: chicken breast. I cubed 2 breasts and seasoned them with salt, black pepper, and Italian seasoning. Then I sauteed the chicken in the same pan that my onions were in, after they were done.


Third white ingredient: mozzarella cheese. First green ingredient: basil pesto (pre-made from the farmer's market).


Second green item: capers. They are are salty and pickled and add the slightest bit of tang to a fairly sweet pizza (because of the onions).


Here it is, all ready for the oven. I was going to add spinach to even out the green and white, but I got lazy. No one but me knew the difference. It is what you make it after all, right?

Baked it up in a 450 degree oven for 10 minutes and it was bubbly and delicious. My husband said it was the best yet. I guess they just keep getting better, because he seems to always say that when I make pizza. Give the Green & White a try. Just be sure to use whatcha got.

Wednesday, June 13, 2012

Indulging on the Island


Sorry for the long absence...I've been working hard preparing for our annual regional staff conference, which took place on Catalina Island over the past 5 days. When we go to Campus By the Sea, it means eating good food for breakfast, lunch, and dinner, thanks to Chef D'Arcy and his crew. This cinnamon roll, for example, was consumed in a matter of minutes by little ol' me. Can we say, proposed calorie intake for the whole day?? It was a marvelous eating experience, nonetheless.

Since I have been indulging while away, I will be back soon with another post. One that will make you a little less jealous, but hungry, all the same.

Friday, June 1, 2012

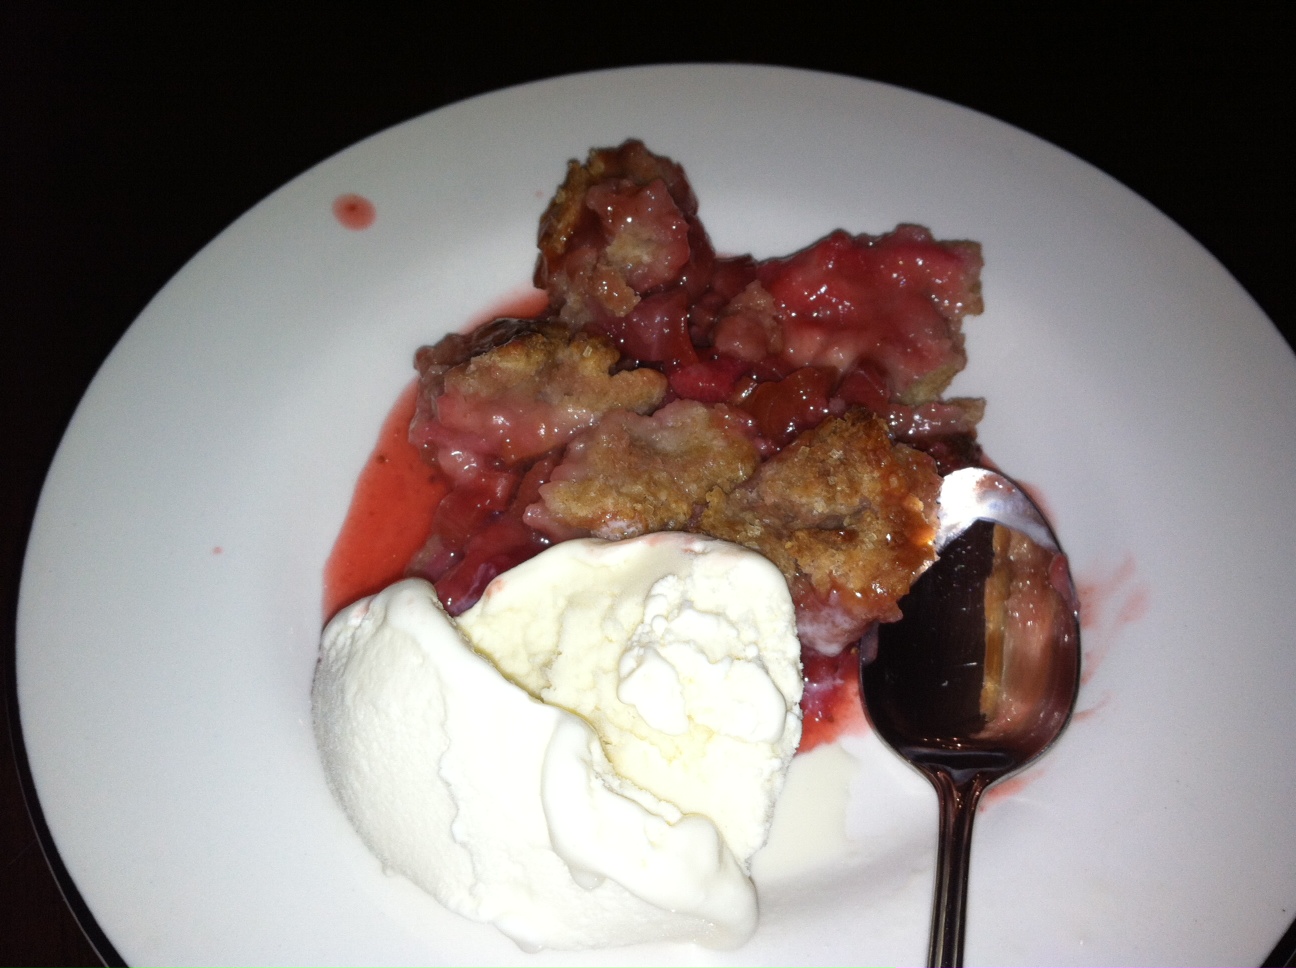
Strawberry Rhubarb Cobbler


Mmm. Summertime. Cobblers and crumbles and pies.  Fruit pies that lead us right into wanting more pie in the fall season - pecan, pumpkin, and pear. Just thinking about it makes me happy.

I get even happier when I get to make something and eat it (and not just think about it). That's what happened when I opened my CSA box to find rhubarb and strawberries. Together. Perfection.


Our dear friends, the Hahns, were getting ready to move from LA to the Bay Area, so we threw them a little going away party. And what brightens up a bittersweet event more than a fiery red dessert a la mode?


I found this recipe on Pioneer Woman's website. Hers was a rhubarb-only cobbler, but I added the strawberries because, 1) I had them, and 2) 3 stalks of rhubarb didn't look like quite enough to feed 9 people. I was pretty excited to do this because I'd never worked with rhubarb before, but I love the tangy tartness that it brings to a sweet dish. Yay for trying new things!

I chopped up the berries and rhubarb in a medium dice. Then added lemon juice,


and sugar. And "gave it a quick toss," as so many Food Network peeps like to say.


I just mixed that up right in the dish I was going to bake it in. Why wash more dishes than you need to? Oh, and I was out of almond extract, so I think I used vanilla.

Then came the cobbler topping, which is sort of like biscuit dough, but a little wetter.

I used 1 cup of white flour and 1 cup of whole wheat flour. Healthy bits here and there make me feel better about the sugar intake... and the butter and shortening. Let's not forget that part.

Note: a little trick my mama taught me. When measuring shortening (from a can), it can be hard to know if you're getting an accurate measure by just stuffing it in a measuring cup. There are air pockets when we do that. So, to get exactly 1/4 cup, you fill a 2-cup measuring cup with 1 cup of water. Then scoop the shortening into the water so that it's submerged in the water (stick it to the bottom to make sure it doesn't float) until it reaches the 1 1/4 cup line. Pour off the water in the sink and put the shortening in your mixing bowl!


Cut in the shortening and butter...


Mix in the wet ingredients (egg and milk)...


Then start topping the fruit with pinches of dough, so that it resembles a cobbled road in a small French village. Hey, it's good to use your imagination when cooking, right?


Sprinkle with sugar for extra sweetness. I used raw sugar - it's crystal-like and shiny. Bake it off for 35 minutes and serve it warm with ice cream!


Here are the lovely ladies, Susan, Allison, and Annie enjoying their dessert. We'll miss you Annie (and Andrew and Colten!)!!

This won't be the last time I make this one. It was a winner. :) Welcome June, welcome summertime!