Pages

Sunday, November 11, 2012

Mexican Wedding Cookies With A Little Fall Flavor


Pumpkin spice lattes. Pumpkin bread. Pumpkin spice coffee creamer, yogurt, cereal bars, granola...'tis the season for pumpkin...stuff. And, I love it. My favorite is probably just plain old pumpkin pie, but I must admit, Trader Joe's Pumpkin Ice Cream has my heart this year too.

You can imagine then, how excited I was when I saw {this recipe} on Cookie + Kate's website. Well, maybe I should have told you how I really like things covered in powdered sugar or cinnamon and sugar. Like donuts. Mmm. I'm getting off track...

Anyway, I found this recipe on a Thursday and I was determined to make them over that weekend. I thought I had run out of pecans, but I decided to do one last search through my pantry, and sure enough, I found a bag of glazed pecans (meant to top a salad). I knew I had some pumpkin puree from a fresh pumpkin in the freezer, and just enough whole wheat pastry flour (one of my staples) for one batch.


The dough is a little sticky, but forms perfect little 1.5 inch balls, which don't spread when baking, so you can place them pretty close together on a baking sheet.


After they bake, let them cool for 5 minutes, then while they are still warm, but cool enough to handle, you roll them in powdered sugar. Mmmm.


They need to cool for another 10-15 minutes, then you can serve them or store them for a couple of days. They are best either on the day-of or the day after. If you wait too long, the sugar may evaporate depending on how moist the air is.


These were easy to make and a great autumn twist on a classic treat. Perfect with a cup of coffee or tea, pumpkin spiced, of course!

This week, my son will be born (he's already 3 days late today) - my doctor has given us an induction date...we are so excited to meet our little one. My guess is that I will be away from blogland for a few weeks, so I will wish you a blessed Thanksgiving and start to the holiday season now. Don't forget to keep cookin' with whatcha got!

xoxo,
Lea

Saturday, November 3, 2012

Prepping for Baby - Freezer Burritos

Our baby is due in 5 days. He doesn't seem too concerned about time. He's comfortable and kicking away at my ribs...and at this rate, he'll be baking in there so long, I'm sure he will be a tall baby, even though I'm just over 5 feet tall myself.
 
I've been trying to use my waiting time wisely. I thought it would be smart to have some ready-to-eat food in the freezer for the days when we don't have time for more than a microwaved, one-hand-held meal. I had seen this idea on a facebook friend's page: homemade frozen burritos!


I had some rotisserie chicken left over as well as some pulled pork in the freezer. I bought a package of whole wheat tortillas, some taco seasoning, olives, shredded cheese, and green chiles. I had a can of refried beans in my pantry.

 
I warmed up the tortillas in the microwave to make them pliable enough to fold up.


I mixed a little bit of taco seasoning into the two different types of meats. I topped the meat with a little bit of beans, olives, chiles, and cheese.

 In the pork burritos, I also added some of my Mexican pickled carrots.

 
After I had used all of the meat, I had 8 burritos. I wrapped them individually in plastic wrap, then put all eight burritos in a resealable freezer bag. Now I've got a quick meal that only needs to be thrown in the microwave for a few minutes! This nesting thing is kind of fun!


Friday, October 26, 2012

Double-Chocolate Peanut Butter Pie

Hubby's birthday was this month and I found the perfect recipe for his special dessert. He loves chocolate and peanut butter. Last year, his mom made an amazing chocolate peanut butter dessert for him up at her house in Carmel. But this year, we stayed close to home, and shared dinner with friends from church.

A friend had posted this pie on Facebook a couple of months back. I flagged the recipe from Food & Wine, and made sure that I had everything ready to make it on my guy's special day.

Double-Chocolate Peanut Butter Pie, from foodandwine.com
Crust
4oz or 1/2 cup semi-sweet chocolate, chopped (I used chocolate chips)
1/2 stick of unsalted butter (I used salted butter and it was fine)
8oz chocolate wafers, finely ground (I used Oreo cookies without the cream center)
Filling
8oz cream cheese, softened
1 cup crunchy peanut butter
1/2 cup sugar
2 tsp vanilla extract
1 cup well-chilled heavy cream
3/4 cup salted roasted peanuts, chopped
Kosher salt
Topping
4oz semi-sweet chocolate, chopped
1/2 cup heavy cream

1. Preheat oven to 375F. In a medium glass bowl, combine chocolate and butter and microwave in 20-second intervals until the chocolate is melted.


Stir well, and then stir in the cookie crumbs.

I couldn't find plain chocolate wafers, so I bought the generic brand of Oreos. This just meant that it took an extra step - removing the cream filling - in order to grind up the cookies. And, I used a scale to make sure I had 8 ounces.
 
 
Press the cookie crumbs over the bottom of a 9-inch springform pan and 1.5 inches up the side. Bake the crust for 10 minutes, or until set; the crust will continue to set up as it cools.


2. In a large bowl, using an electric hand mixer or stand mixer, beat the cream cheese with the peanut butter, sugar, and vanilla extract until blended. In another large bowl (or your stand mixer, just transfer the peanut butter mixture to another bowl), whip the chilled cream until firm.

 
Fold one-third of the whipped cream into the peanut butter mixture to loosen it, then fold in the remaining whipped cream and 1/2 cup of the chopped peanuts. Spoon the filling into the crust, smoothing the surface. Sprinkle lightly with salt and refrigerate until set, about 3 hours.

3. In a medium glass bowl, combine chocolate with heavy whipping cream and microwave in 20 second intervals until the chocolate is melted and cream is hot. Stir well to combine the two, so that you have a smooth glossy sauce. Let it cool until barely warm, stirring occasionally.


4. Spread the chocolate mixture over the chilled peanut butter filling, making sure that it reaches the edges of the pan. Refrigerate until firm, at least 15 minutes. When ready to serve, sprinkle the remaining chopped peanuts around the edge of the pie. Carefully run a sharp knife along the pie crust to loosen, then remove the springform ring.


Using a sharp knife, cut the pie into wedges, running the knife under hot water and drying between each spice for best results.

It's beautiful, it's creamy, chocolate-y, peanut buttery, and perfect with a cup of milk or coffee (or coffee with milk!). If you want to make it entirely no-bake, you could use a store-bought chocolate crust. It is also great to make ahead of time, like a day in advance...

This is a keeper! Happy dessert-makin'!

Friday, October 19, 2012

Mama Lu's or Mama's Lu Dumpling House!?!


Asian restaurants in the United States are funny. The name that's on their menu might differ from the name they had plastered on the front door or awning. When I was growing up we would frequent a Chinese restaurant that we called "Daniel's Place" and I'm pretty sure that's how they would answer the phone, but on the outside, the green awning clearly said "Daniel's Palace." Typo or not, one has to laugh a little.

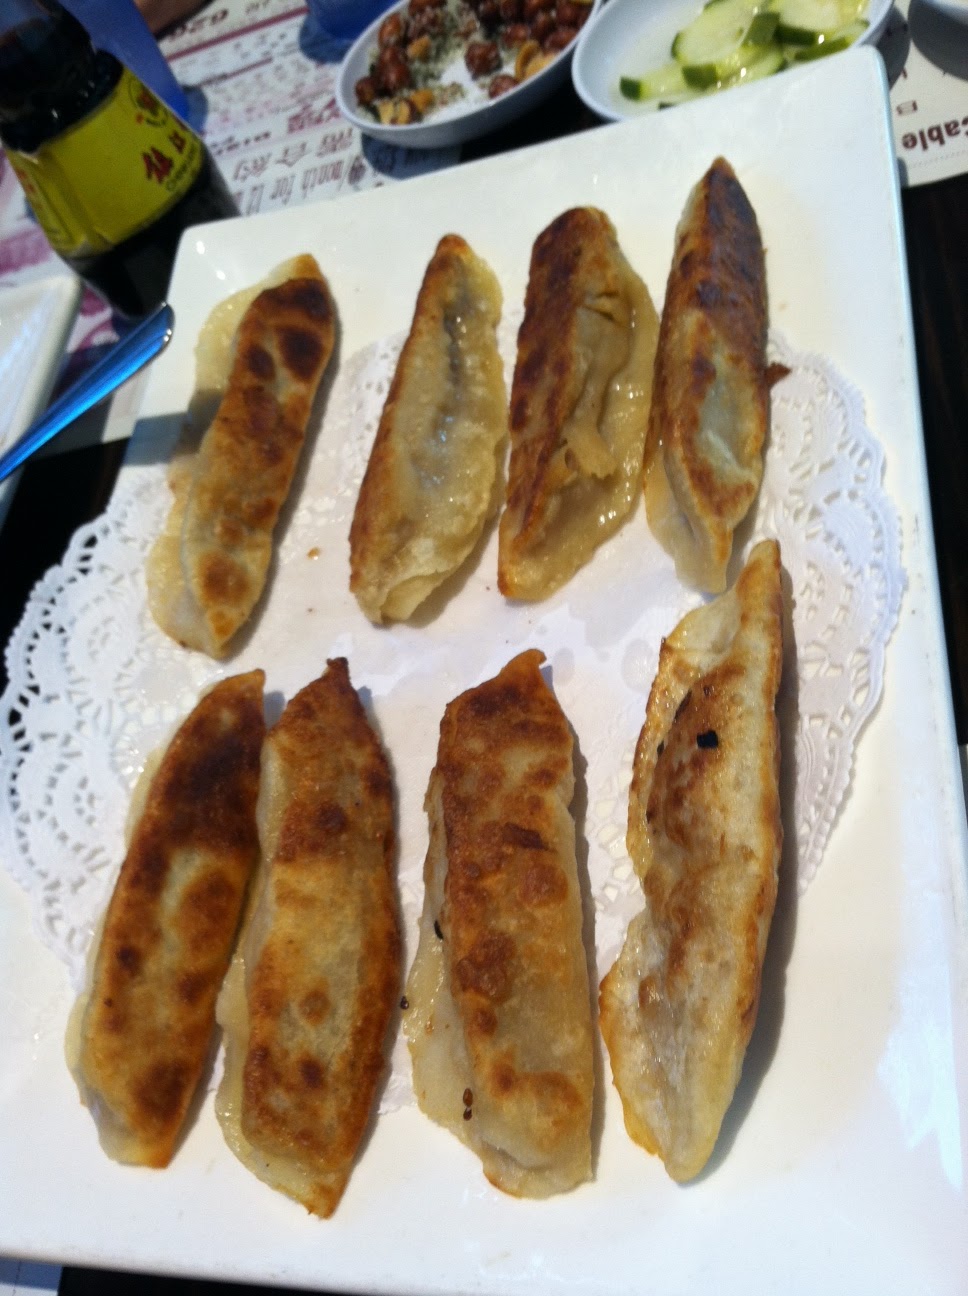
We find the same little things here in Los Angeles. We were meeting some friends for lunch in Monterey Park, a city full of yummy Chinese food. I looked on Yelp so that we could try something new, and I was craving dumplings. I found 3 listings for what seemed like the same place: Mama's Lu, Mama Lu's, Mama Lu's Dumpling House. Turns out there are two locations, with conflicting names on both the door and the menu. It's comical. But either way, this place rocked. We went to the newer and larger location, and it wasn't even crowded at 11am on a Saturday, surprisingly.

Mama's Lu, or whatever it's called, serves up some delish Taiwanese specialties like pan fried rice cakes, which are like coin-sized rice noodles stir-fried with veggies and meat.


They have beef rolls or wraps - like a Chinese burrito made with a green onion pancake and marinated beef and green onions inside. Yum!


And, of course, lots of different styles of dumplings!


I didn't even take a picture of every dish we ordered. There were four of us, and we polished off seven dishes. A little excessive, but soooo good. And, on top of all the goodness in the tummy, it is CHEAP! We ordered 7 dishes and only spent about 45 bucks total, with leftovers to take home.


This place definitely satisfied my craving, and we will be back. Next time maybe with the baby in our arms. :) If ever in the San Gabriel Valley, try out Mama's Lu in Monterey Park!

Saturday, October 13, 2012

Easy Tater Tot Casserole


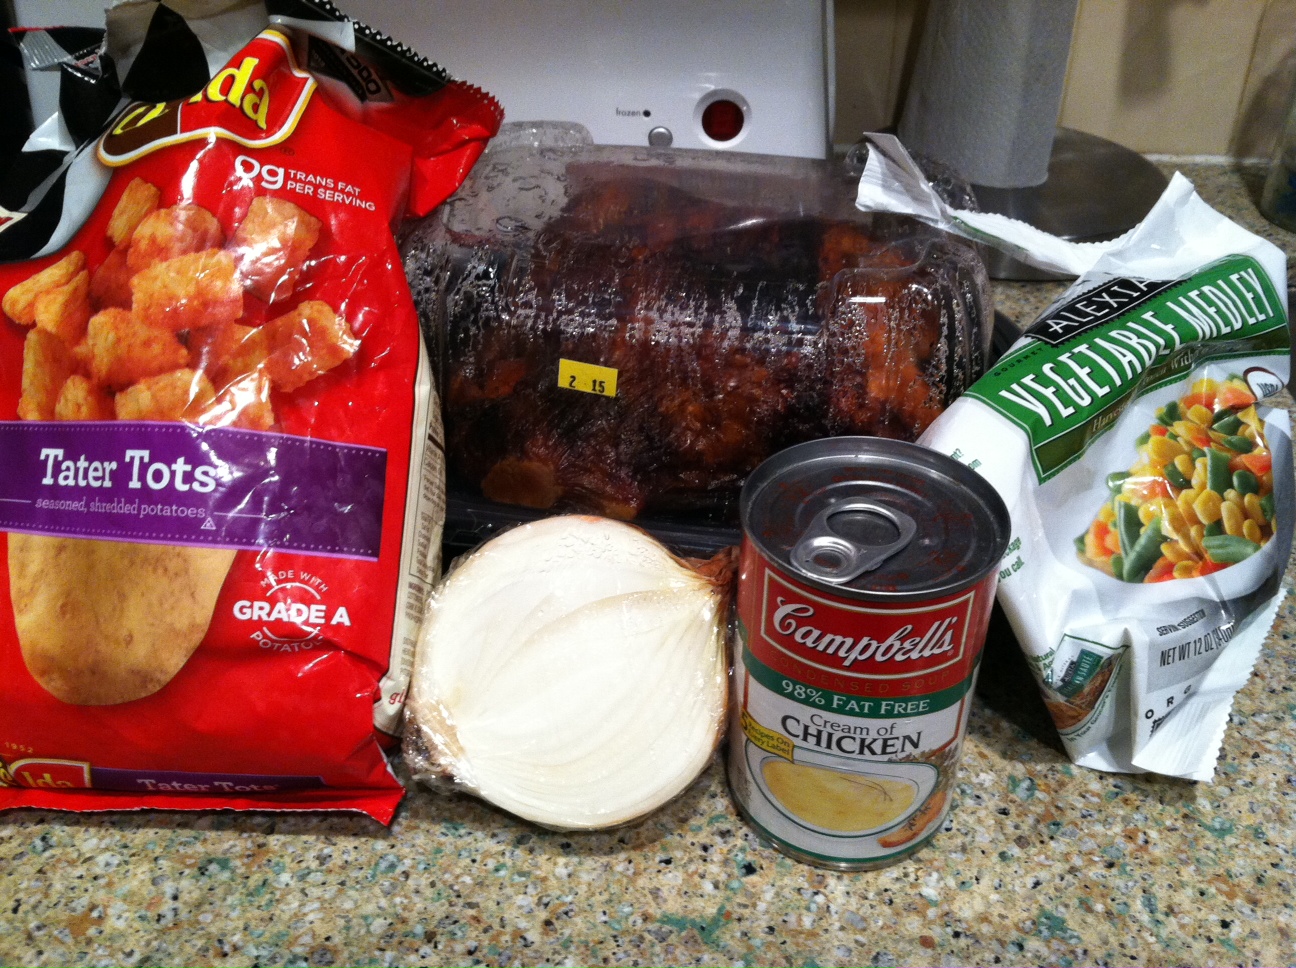
My cousin, Erica, and her family passed through Southern California this summer and left us with some food items that they had used in their hotel kitchenette, including 1/2 bag of tater tots and 1/2 bag of mixed frozen veggies. I thought I would clear out some space in my freezer, so I searched for ideas on tater tot casseroles and I found a YouTube how-to video from allrecipes.com that was perfect for what I had on hand!

It called for:
1.5 lb ground beef
1/2 cup diced onions
4 cups of frozen veggies
2 cans (19oz) of cream of chicken condensed soup
1 bag (32oz) of frozen tater tots


I had everything for about half of this recipe but the ground beef. But, I had just purchased a rotisserie chicken, so I diced up one cooked chicken breast, and baked it at 375F for 40 minutes instead of a whole hour. I also added in some frozen celery and leeks that I had from my CSA box in the spring. You can also use cream of mushroom soup in place of the cream of chicken.


I realized, after we had eaten it, that it was essentially what we like to bring on camping trips to cook over the campfire - ever heard of hobo packets? You can put all these ingredients in a foil pocket, throw it on a campfire for 20-30 minutes, and dinner is served. It's pretty delicious and beats hot dogs any day.


Half of the recipe was enough for about 3 servings. It really hit the spot, and was an easy weekday meal that kids of all ages would love. This was "cookin' with whatcha got" at its finest. Thanks, Erica!

Friday, September 28, 2012

Mexican-Style Pickled Carrots

So here's the story: I had about 1.5-2 cups of shredded carrots left after making coleslaw for a BBQ. They were about to go bad. When things are about to go bad, my mind goes in one direction, normally. And that is, "Can it!!" And, so it was...the carrots got canned...in pickling liquid and married with jalapenos. A perfect wedding in my book. The end.


Notice my new Weck canning jars and tea towel from Aunt Dana! Cute!
For those interested, the recipe is as follows, from food.com:
1/2 lb sliced carrots (I had shredded carrots, so I used those!)
1/2 yellow onions, peeled and sliced (I didn't have any onions, so I skipped them)
1/2 quart warm water
1 3/4 ounces of canned jalapeno peppers, with liquid
1/4 T dried oregano
1 1/2 whole garlic cloves
1/2 cider vinegar
1/16 cup vegetable oil (weird measurement, right? I think I just used a couple of tablespoons)
1/2 bay leaf (I just used a whole one)
1/4 teaspoon salt
*I also added a tablespoon of whole peppercorns, as I read in another online recipe.


Put carrots in a large pot. Add warm water and bring to a boil over high heat.
Boil for 5 minutes and remove from heat.


To the pot, add all remaining ingredients.


Let cool for 2-3 hours. Put in jars and refrigerate. They will keep for one week. Or if you process the jars in boiling water, they will keep for months until you open them!


Makes 8-9 cups. I obviously didn't have 1/2 pound of carrots, so I adjusted the measurements the best I could and ended up with two cups.

I've enjoyed these with quesadillas, but they would be tasty with tacos or accompanying any Mexican favorite! Just like the taco truck, but homemade. Happy cookin'!

Wednesday, September 19, 2012

Quick Whole Wheat Muffins

Sorry for the delay in writing a new post.

I've been a little busy with work, baby showers, and fighting off the heat. And, for some reason, my pregnant body would rather lay on the couch and watch "Diners, Drive-ins, and Dives" these days. Oy.

I have been cooking, though! Occassionally. I think it's been more baking lately, but that counts. My sweet tooth is in full effect. That's why I needed to search for some sweet, but healthy recipes. This is one of them. I searched for whole wheat muffins made with sour cream, because I had sour cream, go figure.

Quick, Easy & Moist Whole Wheat Muffins (from thekitchn.com)
makes 12 muffins
2 cups white whole wheat flour
1 teaspoon baking soda
1 teaspoon salt
1/2 teaspoon cinnamon
1/4 teaspoon ginger
1 1/4 cup sour cream
1/4 cup honey (I used part honey, part agave nectar)
1 egg
1/4 cup olive oil (I used applesauce instead)
1/2 teaspoon vanilla extract
Heat the oven to 375°F. Prepare a muffin pan with liners, or by lightly greasing each well with olive oil or baking spray.
In a large bowl, lightly whisk together the flour, baking soda, salt, cinnamon and ginger.
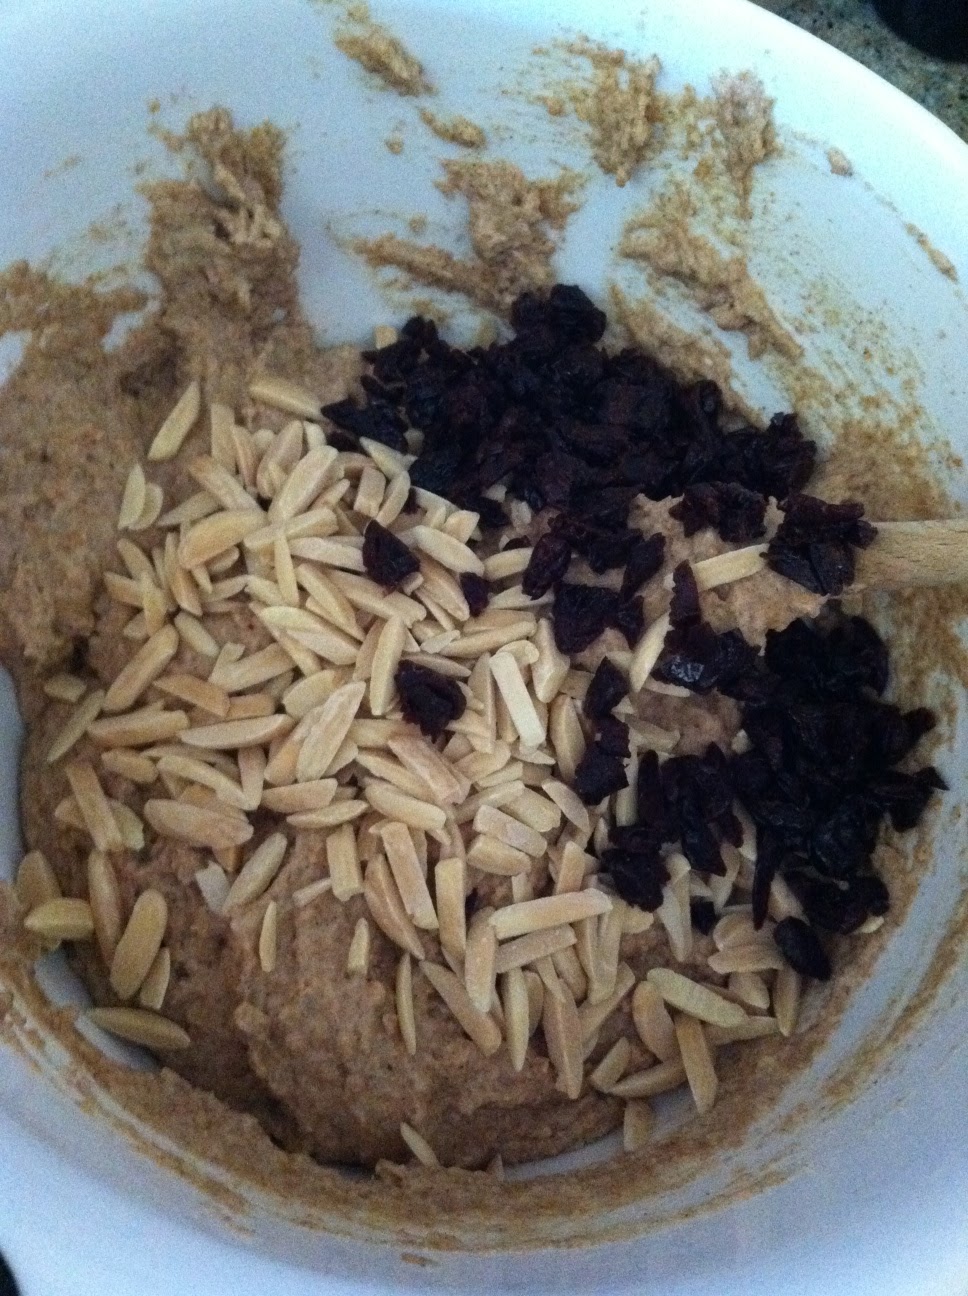
Whisk the sour cream, honey, egg, olive oil, and vanilla extract together in a separate small bowl. Make a small well in the center of the dry ingredients and pour in this liquid mixture. Use a spatula or wooden spoon to gently but firmly fold the ingredients together, folding from the bottom up to make sure all the dry ingredients are incorporated. Stop as soon as the mixture comes together; do not overmix. Depending on the fat content of the sour cream the mixture will range in thickness from a gooey muffin batter to the consistency of a very wet cookie dough.
I also added dried cherries and slivered almonds for some extra flavor and texture.
Bake for 15 to 18 minutes or until barely golden on top, and the top springs back a bit when touched with a finger.
The key to keeping these moist is to underbake them ever so slightly. They shouldn't be gooey inside, but don't be afraid to take them out of the oven when they are slightly underdone.

They are indeed moist and tasty and satisfying. Even for this pregnant girl. They may have been even better with a crumb topping, but that would mean more calories. I'll leave that decision up to you. Happy bakin'!