Pages

Showing posts with label The Sweeter Side. Show all posts

Thursday, August 1, 2013

Sticky Toffee Pudding, How I Love Thee

Finally, a moment to blog. Woohoo!

June and July were a tad bit busy, I'd say. Conference planning and executing, family visits, and a spontaneous trip to the UK - that's what we've been up to. And of course we caught a wee cold on the other side of the 10+ hour flight home, so we're recovering, to say the least.


But it's good to be home and so good to be able to share one of our family's most favorite desserts: Sticky Toffee Pudding. The picture isn't great, but believe me, it's yummy! We first met this fine British dish at a Bible study group some 6 years ago. All I knew is that it was rich, delectable, and from Bristol Farms grocery store. Then a few months later, I was watching Food Network, and there was a feature on a Haagen-Dazs "new flavor" competition, where this Asian chick won for her Sticky Toffee Pudding ice cream. Find it, it's amazing...Aw, man. I just looked it up and they say the discontinued the flavor. What?!?

Ok, all the more reason to make this recipe and eat it with vanilla ice cream. You'll know what I mean if you try it.

What is it, you ask? A moist sticky cake that is drenched in toffee sauce. It's sweet, sticky, and toffee-ey. And it's made with dates. Strange, I know. But when you bite into these Medjool dates, it's like biting into brown sugar. No wonder dates are often wrapped in bacon for appetizers. The sweet and salty combo is irresistible.

I got inspired to make this at home (and got the recipe) from Bakerella.com, who got the recipe from Martha Stewart, of course! And, I was surprised at how easy it was. Here we go:

 
Start by chopping up those sticky Medjool dates. I found them at Sprouts, our local grocery that has lots of healthy foods and bins of grains and dried fruits. But if you can't find them, regular dates will work too. After they are chopped, they are a big sticky glob - soak it all in a cup of strong black coffee. Yum. Prep a baking dish by buttering and flouring it.

 
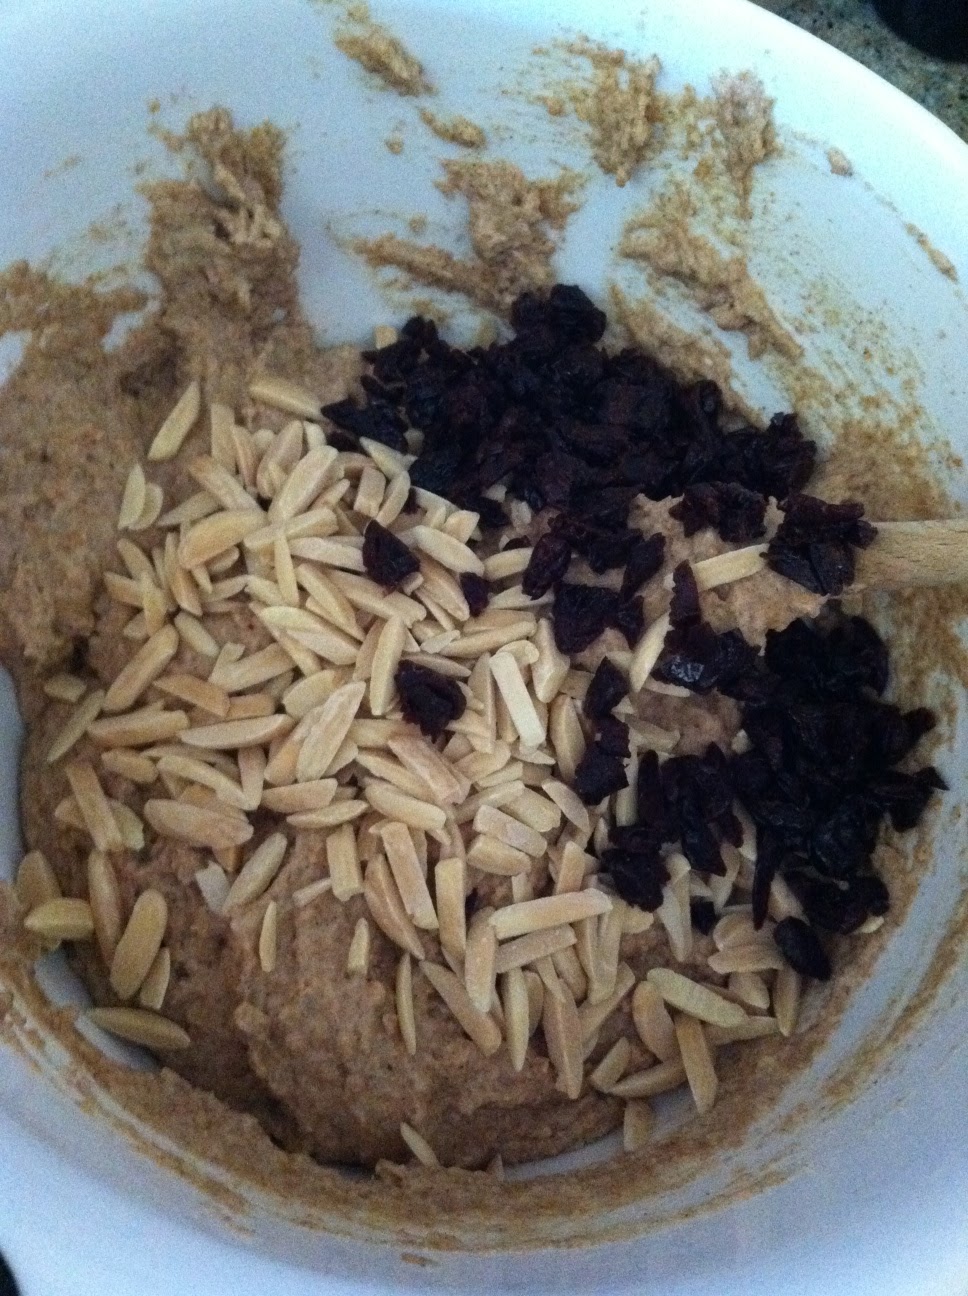
Then we start the batter. Brown sugar, butter, vanilla, eggs, flour, baking powder, baking soda...nothing out of the ordinary. Add the coffee-date mixture, and it's done! Throw it in the oven and while you wait, you make the toffee sauce. Oh yes!


Equal parts brown sugar, heavy cream, and butter. What trio could possibly be better??? You let it melt and boil until it gets thick and syrupy.

 
When the cake is done, and you can get a clean skewer in and out of it, keep poking holes in the surface so that we can get as much sauce soaked in there as possible!


And then, you pour half of the glorious toffee sauce over the cake. It should look like this...
 

It can be left at room temperature until it's ready to be served, then warm it back up in the oven, scoop it up into portions, top it with vanilla ice cream, and pour more toffee sauce on top of that. You cannot go wrong with this dessert. Seriously. Plate-licking will happen.

Next time, I may make them in individual ramekins. You can also use a shallower dish and cut it into squares. Do yourself a favor and make this stuff. It's so good, that we ordered it at every restaurant in England (that had it on the menu). Cheers! To happy pudding-makin'!

Sunday, November 11, 2012

Mexican Wedding Cookies With A Little Fall Flavor


Pumpkin spice lattes. Pumpkin bread. Pumpkin spice coffee creamer, yogurt, cereal bars, granola...'tis the season for pumpkin...stuff. And, I love it. My favorite is probably just plain old pumpkin pie, but I must admit, Trader Joe's Pumpkin Ice Cream has my heart this year too.

You can imagine then, how excited I was when I saw {this recipe} on Cookie + Kate's website. Well, maybe I should have told you how I really like things covered in powdered sugar or cinnamon and sugar. Like donuts. Mmm. I'm getting off track...

Anyway, I found this recipe on a Thursday and I was determined to make them over that weekend. I thought I had run out of pecans, but I decided to do one last search through my pantry, and sure enough, I found a bag of glazed pecans (meant to top a salad). I knew I had some pumpkin puree from a fresh pumpkin in the freezer, and just enough whole wheat pastry flour (one of my staples) for one batch.


The dough is a little sticky, but forms perfect little 1.5 inch balls, which don't spread when baking, so you can place them pretty close together on a baking sheet.


After they bake, let them cool for 5 minutes, then while they are still warm, but cool enough to handle, you roll them in powdered sugar. Mmmm.


They need to cool for another 10-15 minutes, then you can serve them or store them for a couple of days. They are best either on the day-of or the day after. If you wait too long, the sugar may evaporate depending on how moist the air is.


These were easy to make and a great autumn twist on a classic treat. Perfect with a cup of coffee or tea, pumpkin spiced, of course!

This week, my son will be born (he's already 3 days late today) - my doctor has given us an induction date...we are so excited to meet our little one. My guess is that I will be away from blogland for a few weeks, so I will wish you a blessed Thanksgiving and start to the holiday season now. Don't forget to keep cookin' with whatcha got!

xoxo,
Lea

Friday, October 26, 2012

Double-Chocolate Peanut Butter Pie

Hubby's birthday was this month and I found the perfect recipe for his special dessert. He loves chocolate and peanut butter. Last year, his mom made an amazing chocolate peanut butter dessert for him up at her house in Carmel. But this year, we stayed close to home, and shared dinner with friends from church.

A friend had posted this pie on Facebook a couple of months back. I flagged the recipe from Food & Wine, and made sure that I had everything ready to make it on my guy's special day.

Double-Chocolate Peanut Butter Pie, from foodandwine.com
Crust
4oz or 1/2 cup semi-sweet chocolate, chopped (I used chocolate chips)
1/2 stick of unsalted butter (I used salted butter and it was fine)
8oz chocolate wafers, finely ground (I used Oreo cookies without the cream center)
Filling
8oz cream cheese, softened
1 cup crunchy peanut butter
1/2 cup sugar
2 tsp vanilla extract
1 cup well-chilled heavy cream
3/4 cup salted roasted peanuts, chopped
Kosher salt
Topping
4oz semi-sweet chocolate, chopped
1/2 cup heavy cream

1. Preheat oven to 375F. In a medium glass bowl, combine chocolate and butter and microwave in 20-second intervals until the chocolate is melted.


Stir well, and then stir in the cookie crumbs.

I couldn't find plain chocolate wafers, so I bought the generic brand of Oreos. This just meant that it took an extra step - removing the cream filling - in order to grind up the cookies. And, I used a scale to make sure I had 8 ounces.
 
 
Press the cookie crumbs over the bottom of a 9-inch springform pan and 1.5 inches up the side. Bake the crust for 10 minutes, or until set; the crust will continue to set up as it cools.


2. In a large bowl, using an electric hand mixer or stand mixer, beat the cream cheese with the peanut butter, sugar, and vanilla extract until blended. In another large bowl (or your stand mixer, just transfer the peanut butter mixture to another bowl), whip the chilled cream until firm.

 
Fold one-third of the whipped cream into the peanut butter mixture to loosen it, then fold in the remaining whipped cream and 1/2 cup of the chopped peanuts. Spoon the filling into the crust, smoothing the surface. Sprinkle lightly with salt and refrigerate until set, about 3 hours.

3. In a medium glass bowl, combine chocolate with heavy whipping cream and microwave in 20 second intervals until the chocolate is melted and cream is hot. Stir well to combine the two, so that you have a smooth glossy sauce. Let it cool until barely warm, stirring occasionally.


4. Spread the chocolate mixture over the chilled peanut butter filling, making sure that it reaches the edges of the pan. Refrigerate until firm, at least 15 minutes. When ready to serve, sprinkle the remaining chopped peanuts around the edge of the pie. Carefully run a sharp knife along the pie crust to loosen, then remove the springform ring.


Using a sharp knife, cut the pie into wedges, running the knife under hot water and drying between each spice for best results.

It's beautiful, it's creamy, chocolate-y, peanut buttery, and perfect with a cup of milk or coffee (or coffee with milk!). If you want to make it entirely no-bake, you could use a store-bought chocolate crust. It is also great to make ahead of time, like a day in advance...

This is a keeper! Happy dessert-makin'!

Wednesday, September 19, 2012

Quick Whole Wheat Muffins

Sorry for the delay in writing a new post.

I've been a little busy with work, baby showers, and fighting off the heat. And, for some reason, my pregnant body would rather lay on the couch and watch "Diners, Drive-ins, and Dives" these days. Oy.

I have been cooking, though! Occassionally. I think it's been more baking lately, but that counts. My sweet tooth is in full effect. That's why I needed to search for some sweet, but healthy recipes. This is one of them. I searched for whole wheat muffins made with sour cream, because I had sour cream, go figure.

Quick, Easy & Moist Whole Wheat Muffins (from thekitchn.com)
makes 12 muffins
2 cups white whole wheat flour
1 teaspoon baking soda
1 teaspoon salt
1/2 teaspoon cinnamon
1/4 teaspoon ginger
1 1/4 cup sour cream
1/4 cup honey (I used part honey, part agave nectar)
1 egg
1/4 cup olive oil (I used applesauce instead)
1/2 teaspoon vanilla extract
Heat the oven to 375°F. Prepare a muffin pan with liners, or by lightly greasing each well with olive oil or baking spray.
In a large bowl, lightly whisk together the flour, baking soda, salt, cinnamon and ginger.
Whisk the sour cream, honey, egg, olive oil, and vanilla extract together in a separate small bowl. Make a small well in the center of the dry ingredients and pour in this liquid mixture. Use a spatula or wooden spoon to gently but firmly fold the ingredients together, folding from the bottom up to make sure all the dry ingredients are incorporated. Stop as soon as the mixture comes together; do not overmix. Depending on the fat content of the sour cream the mixture will range in thickness from a gooey muffin batter to the consistency of a very wet cookie dough.
I also added dried cherries and slivered almonds for some extra flavor and texture.
Bake for 15 to 18 minutes or until barely golden on top, and the top springs back a bit when touched with a finger.
The key to keeping these moist is to underbake them ever so slightly. They shouldn't be gooey inside, but don't be afraid to take them out of the oven when they are slightly underdone.

They are indeed moist and tasty and satisfying. Even for this pregnant girl. They may have been even better with a crumb topping, but that would mean more calories. I'll leave that decision up to you. Happy bakin'!

Monday, August 13, 2012

Gluten-Free Fruit Crumble

More and more people in my life have switched to gluten-free diets, after finding out that gluten was the culprit in making them feel awful or just plain sick.

Before last month, I had never baked anything gluten-free. Honestly, I've looked at recipes and they often require ingredients that I don't have in my pantry, like xanthum gum. Yeah, I haven't expanded my staples to include that...yet.

So, I was pleased when I finally found a recipe from the NY Times for a dessert that only called for things I already had in my pantry shelves (minus one thing!). We were having our neighborhood BBQ, and I wanted to make some options for our next-door neighbors who are gluten-free peeps.

While I was at the store for the gluten-free rolled oats, I picked out some ripe nectarines and blueberries.


I prepped the fruit right in the glass dish that I was going to bake it in. So, I greased the edges on the pan and added the sliced nectarines and blueberries. To that, I added agave nectar, vanilla extract, and almond extract. The recipe calls for cinnamon, but I think I left it out on accident. The recipe has you bake the fruit mixture before adding the topping. I baked the fruit for 20 minutes while I worked on the crumble topping mixture.

The topping actually takes two steps as well. You also have to bake it on its own before adding it to the fruit and baking it a second time.


The topping is made from gluten-free oats, quinoa flour, turbinado or raw sugar, nutmeg, salt, and unsalted butter. The recipe can be found {here}.To make the quinoa flour, you grind up quinoa in a blender or spice grinder. I used my handy Magic Bullet. It worked quite well!


Then you blend all the dry ingredients in a food processor. Then you add the butter and pulse it until it's well-combined. I doubled the recipe because my dish is slightly bigger than your standard 9 x 13. I had plenty left over, so I froze it and kept it for future crumbles!


In a 350 preheated oven, you bake the mixture on parchment paper (or foil) on a baking sheet for 20 minutes, rotating the pan if needed at the halfway point.
Here's the before (top picture) and after (bottom picture). You can see how the quinoa and oats brown and crisp up in the oven.

By the time the topping was ready, the fruit had been sitting for about 30 minutes, and the juice from the fruit had collected in the dish. It seemed a bit watery without any thickener, so I added mixed a little bit of water with about a tablespoon of corn starch and tossed it in with the fruit before sprinkling on the oat topping. I then baked the whole dish at 350 for another 20-25 minutes until it was bubbling at the bottom.

The crumble was a hit! Our neighbors loved it and kept all the leftovers (it was one of four desserts that night). I've since made another crumble with pluots, apples, and cherries, which was equally as yummy. It's definitely a healthy dessert, low in added sugar, and high in fiber and protein!

Friday, June 1, 2012

Strawberry Rhubarb Cobbler


Mmm. Summertime. Cobblers and crumbles and pies.  Fruit pies that lead us right into wanting more pie in the fall season - pecan, pumpkin, and pear. Just thinking about it makes me happy.

I get even happier when I get to make something and eat it (and not just think about it). That's what happened when I opened my CSA box to find rhubarb and strawberries. Together. Perfection.


Our dear friends, the Hahns, were getting ready to move from LA to the Bay Area, so we threw them a little going away party. And what brightens up a bittersweet event more than a fiery red dessert a la mode?


I found this recipe on Pioneer Woman's website. Hers was a rhubarb-only cobbler, but I added the strawberries because, 1) I had them, and 2) 3 stalks of rhubarb didn't look like quite enough to feed 9 people. I was pretty excited to do this because I'd never worked with rhubarb before, but I love the tangy tartness that it brings to a sweet dish. Yay for trying new things!

I chopped up the berries and rhubarb in a medium dice. Then added lemon juice,


and sugar. And "gave it a quick toss," as so many Food Network peeps like to say.


I just mixed that up right in the dish I was going to bake it in. Why wash more dishes than you need to? Oh, and I was out of almond extract, so I think I used vanilla.

Then came the cobbler topping, which is sort of like biscuit dough, but a little wetter.

I used 1 cup of white flour and 1 cup of whole wheat flour. Healthy bits here and there make me feel better about the sugar intake... and the butter and shortening. Let's not forget that part.

Note: a little trick my mama taught me. When measuring shortening (from a can), it can be hard to know if you're getting an accurate measure by just stuffing it in a measuring cup. There are air pockets when we do that. So, to get exactly 1/4 cup, you fill a 2-cup measuring cup with 1 cup of water. Then scoop the shortening into the water so that it's submerged in the water (stick it to the bottom to make sure it doesn't float) until it reaches the 1 1/4 cup line. Pour off the water in the sink and put the shortening in your mixing bowl!


Cut in the shortening and butter...


Mix in the wet ingredients (egg and milk)...


Then start topping the fruit with pinches of dough, so that it resembles a cobbled road in a small French village. Hey, it's good to use your imagination when cooking, right?


Sprinkle with sugar for extra sweetness. I used raw sugar - it's crystal-like and shiny. Bake it off for 35 minutes and serve it warm with ice cream!


Here are the lovely ladies, Susan, Allison, and Annie enjoying their dessert. We'll miss you Annie (and Andrew and Colten!)!!

This won't be the last time I make this one. It was a winner. :) Welcome June, welcome summertime!

Saturday, May 12, 2012

Brownie + Cookie = Brookie!

I wish I had a better picture...one with a cross-section of the treat would have been good...sorry!
I first saw these on an episode of Unique Sweets on the Cooking Channel. Then about a week later, my cousin posted a picture of the ones she made and called them "brookies." That was it. I made it my next baking mission to try out these little genius treats.

A chocolate chip cookie baked into a brownie. The best of both worlds. No need to choose one over the other. Or feel guilty for having one of each. Just eat one of these yummy baked goods and you'll be satisfied...at least for the moment before you contemplate having another.


I used a boxed brownie mix by Duncan Hines - Dark Chocolate Brownies.


Follow the directions exactly as the box says...

I did make the cookie dough from scratch, although you could do the same and use a mix. It doesn't really matter.

I used my personal favorite chocolate chip cookie recipe from Kitchen Aid. It's my fave because they are really chewy (lots of brown sugar), soft, and a little cake-y. Not crispy or flat.


Here's the recipe:
Kitchen Aid's Chocolate Chip Cookies
1 cup sugar
1 cup brown sugar
1 cup softened butter (thanks Eleanor for noticing this was missing before!)
2 eggs
1.5 tsp vanilla
3 cups flour
1 tsp salt
1 tsp baking soda
12 oz. chocolate chips

Preheat oven to 350F. Mix sugars, butter, eggs, and vanilla in a medium-large mixing bowl with a hand mixer or in your stand mixer (like a Kitchen Aid - wink, wink). Blend it for about 2 minutes until everything is well incorporated. Sift the flour, salt, and baking soda in a small bowl. Add the flour mixture to the butter mixture. Stir in chocolate chips by hand. Drop by spoonfuls on an ungreased cookie sheet. Bake 8-10 minutes. Cool for 10 minutes before transfering to a wire rack to cool completely.

Now, you'll notice, that is the normal cookie recipe. For the brookies, instead of dropping spoonfuls onto a cookie sheet, I greased two muffin tins with cooking spray, and then put in one heaping spoonful of brownie batter and one spoonful of cookie dough.


Here's what they look like after baking for 15-20 minutes:


It made exactly 24 muffin-sized brookies. They would be awesome served warm with a scoop of vanilla ice cream and a drizzle of chocolate syrup. But, they are so good on their own too!

Happy bakin'!