Pages

Showing posts with label breakfast. Show all posts

Wednesday, September 19, 2012

Quick Whole Wheat Muffins

Sorry for the delay in writing a new post.

I've been a little busy with work, baby showers, and fighting off the heat. And, for some reason, my pregnant body would rather lay on the couch and watch "Diners, Drive-ins, and Dives" these days. Oy.

I have been cooking, though! Occassionally. I think it's been more baking lately, but that counts. My sweet tooth is in full effect. That's why I needed to search for some sweet, but healthy recipes. This is one of them. I searched for whole wheat muffins made with sour cream, because I had sour cream, go figure.

Quick, Easy & Moist Whole Wheat Muffins (from thekitchn.com)
makes 12 muffins
2 cups white whole wheat flour
1 teaspoon baking soda
1 teaspoon salt
1/2 teaspoon cinnamon
1/4 teaspoon ginger
1 1/4 cup sour cream
1/4 cup honey (I used part honey, part agave nectar)
1 egg
1/4 cup olive oil (I used applesauce instead)
1/2 teaspoon vanilla extract
Heat the oven to 375°F. Prepare a muffin pan with liners, or by lightly greasing each well with olive oil or baking spray.
In a large bowl, lightly whisk together the flour, baking soda, salt, cinnamon and ginger.
Whisk the sour cream, honey, egg, olive oil, and vanilla extract together in a separate small bowl. Make a small well in the center of the dry ingredients and pour in this liquid mixture. Use a spatula or wooden spoon to gently but firmly fold the ingredients together, folding from the bottom up to make sure all the dry ingredients are incorporated. Stop as soon as the mixture comes together; do not overmix. Depending on the fat content of the sour cream the mixture will range in thickness from a gooey muffin batter to the consistency of a very wet cookie dough.
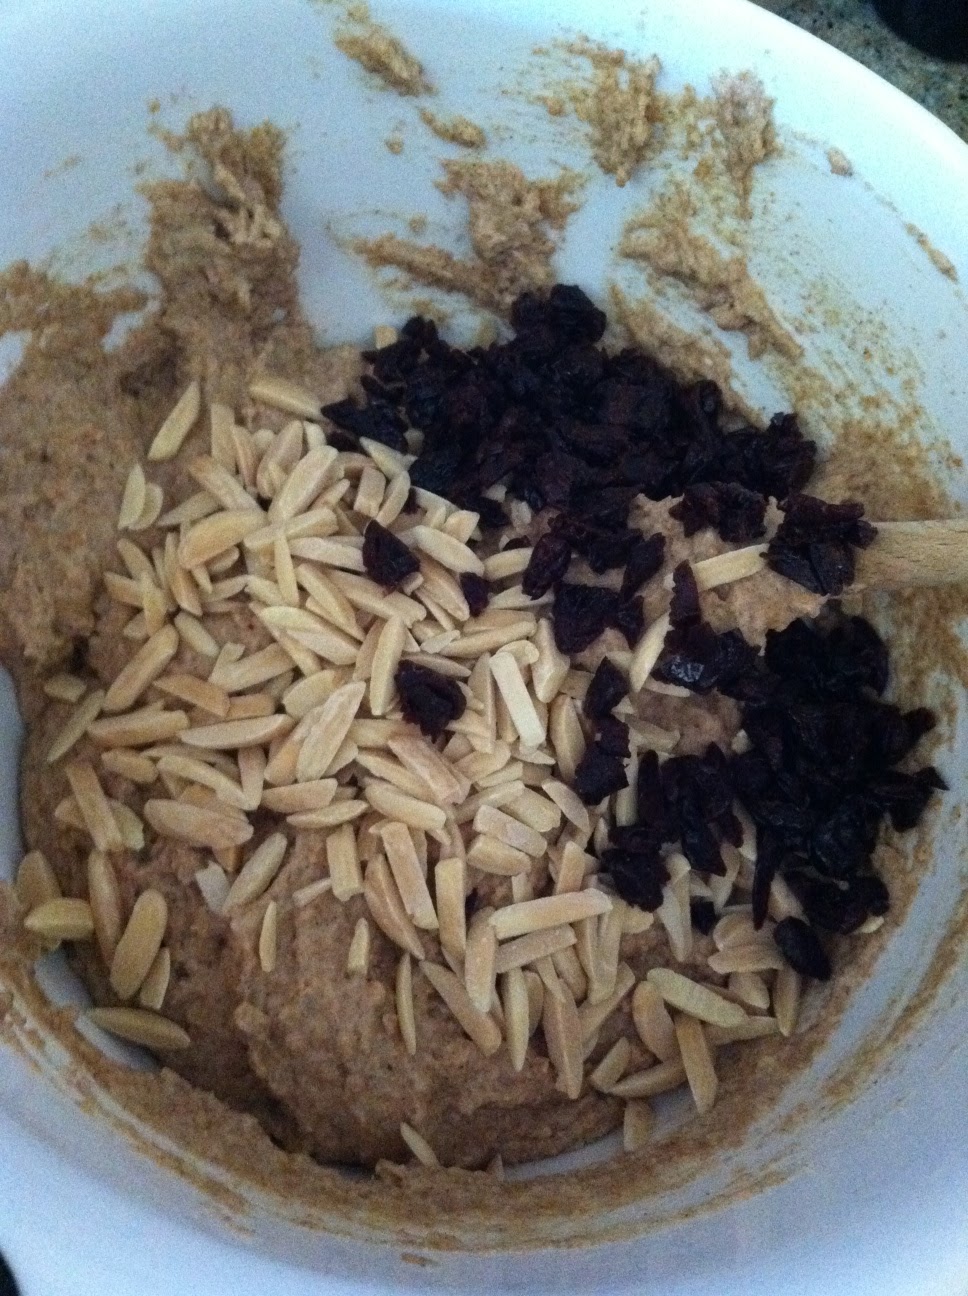
I also added dried cherries and slivered almonds for some extra flavor and texture.
Bake for 15 to 18 minutes or until barely golden on top, and the top springs back a bit when touched with a finger.
The key to keeping these moist is to underbake them ever so slightly. They shouldn't be gooey inside, but don't be afraid to take them out of the oven when they are slightly underdone.

They are indeed moist and tasty and satisfying. Even for this pregnant girl. They may have been even better with a crumb topping, but that would mean more calories. I'll leave that decision up to you. Happy bakin'!

Friday, May 4, 2012

Baked Egg Cups On The Go


When I first got married, I was in graduate school and worked part-time. For the first four months or so, I would wake up each day when my husband got up for work and make him an egg sandwich to eat on the way to work. Toasted bread with a little bit of butter and cheesy scrambled eggs, all wrapped up in a papertowel and a cup of coffee in a travel mug. I was ambitiously domestic.

Five years later, even though I work at home, let's face it...I'm not always motivated to make breakfast early in the morning. However, I've discovered a few shortcuts in order to still have a healthy, filling meal on the go for my man. :) Food is my love language.

One of my shortcuts is the baked egg cup. I found the idea in the South Beach Diet book. You can make a bunch of them early in the week and they will last for a few days!

They are like mini omelets that you can fill with whatever you have on hand. I use egg substitute or just egg whites, but you can just as easily scramble up whole eggs and fill up the muffin tin in the same way.

Preheat your oven to 325F. Generously coat the muffin tin with cooking spray. Add 2-3 tablespoons of veggies and cheese (and meat if you like) - whatever you have in your fridge.  Then pour in the egg so there's about a 1/4 inch from the top of the tin. Sprinkle with salt and pepper. If you like it spicy, you can add a dash of hot sauce too.

These egg cups had sauteed asparagus, green onion, and shredded cheddar cheese.
Bake them in the oven for 30 minutes or until the egg sets. They will puff up quite a bit, but they deflate once you let them rest on the counter. They keep in the refrigerator for up to 5 days or can be stored in the freezer for a couple of months. The muffin size is great for portion control. Two or three of these heated up in the morning will fill me up for the entire morning. Kids will love them too. And, they are carb-free. Try adding these to your breakfast repetoire...happy cookin'!

Monday, March 19, 2012

Whole Wheat Lemon Cherry Scones


Maybe I should temporarily change this blog to "Bakin' With Yogurt From the Fridge," because, let's be real, that's what I've been doing lately. I went searching for scone recipes using yogurt, and I found a great new (well, new to me) food blog: Cookie + Kate. She cooks vegetarian with whole foods. Nice and healthy.

The featured recipe was for "Heavenly Lemon Blueberry Scones," using frozen or fresh blueberries and lemon zest. I didn't have blueberries, but I did just purchase a huge bag of dried cherries from Costco, and I had plenty of lemons, so I decided to go for it.


First, the dry ingredients go in. What I do love about this recipe is that it uses 100% whole wheat flour. No combo of white flour and whole wheat, just the whole stuff. Baking powder, salt, and raw sugar are added too.


Then I added my lemon zest and butter. After that I added the dried cherries, which were chopped up a little so that they wouldn't be such big pieces of cherry in each bite.


In go the yogurt and milk...I used soy milk because that's all I had. I'm one of those lactose-intolerant folks. But of course regular cow's milk or even almond or rice milk would probably do just fine too!


It should form a sticky ball once everything is mixed together.


Flour a clean surface or cutting board, then shape the dough into a round patty that is about 1/2 -3/4 inch thick. Then cut it into wedges for baking. I brushed mine with a little milk, then sprinkled the raw sugar on top.


This is how they turned out! Golden brown and delicious with a cup of coffee or tea! And, they are totally guilt-free! Ok, besides the 5 tablespoons of butter...but you can't make scones without it, so get over it. I did. :)

Whole Wheat Lemon Cherry Scones
Adapted from Cookie + Kate, who used a recipe from Chocolate & Carrots

Ingredients:
  • 1 1/2 cups whole wheat pastry flour (I use Bob's Red Mill flour)
  • 1/2 cup whole wheat flour
  • 1 tablespoon baking powder
  • 3 tablespoons turbinado (raw cane) sugar, plus more for sprinkling on top
  • 1/8 teaspoon salt
  • 5 tablespoons cold unsalted butter
  • zest of one lemon (I used 2 small ones)
  • 3/4 -1 cup dried cherries
  • 1/2 cup plain low fat Greek yogurt (I used 0% fat yogurt by Fage)
  • 1/2 cup low fat milk (I used light soy milk)
Instructions:
  1. Preheat oven to 425°.
  2. Combine flours, baking powder, sugar and salt in a bowl and whisk together.
  3. Slice butter and drop into dry ingredients. If you have a pastry cutter, use it to cut the butter into the flour. If you don’t have a pastry cutter, use a knife to cut the butter into tiny pieces and mix it into the flour.
  4. Add dried cherries and lemon zest and gently stir.
  5. Gently mix in milk and yogurt. Eventually you’ll need to use your hands to knead the last of the flour into the dough.
  6. Form dough into a circle about that’s about an inch deep all around. Cut the circle into 8-12 slices, depending on how big you want them.
  7. Separate slices and place on a baking sheet covered in parchment paper or foil.
  8. Sprinkle the tops of the scones with a bit of raw sugar.
  9. Bake for 15 minutes or until light brown.

Friday, January 6, 2012

Homemade Granola

I made a few different food gifts this year for Christmas. It has become a very economical way to love on our many cousins, aunts, and uncles that we get to visit with every winter.

This year, I went with a sort of breakfast theme, serving up granola, hot cocoa mix, and a homemade jar of jam, fruit butter, or jelly.

I got this recipe for homemade granola from our cousin, Sarah. She's a great cook and has her own {blog}too. I love making my own granola because I can control what goes in it, like the amount of sugar, and I can use whatever I have in my cupboards to make it unique each time. 

First, preheat the oven to 275F. Prepare your baking pan (either a 9x13 pan or a cookie sheet with edges) by covering it with aluminum foil and spraying it with cooking spray.


Second, mix up all of the dry ingredients: oats, wheat germ, salt, brown sugar, nuts, and dried fruit. You can wait to add the dried fruit until the middle of the baking process (unlike how I did it this time) so that the fruit doesn't taste too "cooked."


Then you mix the wet ingredients (no picture, sorry!) in a small saucepan: maple syrup (I use sugar-free pancake syrup), flavorings like vanilla or almond extract and cinnamon or pumpkin pie spice, vegetable oil, and a little bit of water. Heat it up until it reaches a simmer, then take it off the heat and pour it onto the dry ingredient mix. Stir thoroughly so that all of the oats are coated with the wet mixture.

Then, pour out the granola onto your prepared cookie sheet. Make sure that it's evenly spread out. I like to pat mine down flat so that the grains actually look like one large sheet. When it bakes, it will become crunchy and become little clusters.


I packaged my granola in these little bags that I found on eBay.  Aren't they cute? I especially like the peekaboo windows. I printed up labels and it was ready to deliver to the family!


Here's the recipe:
Homemade Granola
2 cups old-fashioned oats
1/2 cup wheat germ
2 Tbs. dark brown sugar (I used Splenda brown sugar blend)
1/4 tsp. salt
1 cup Extra Ingredients (see complete list below)
1/4 cup maple syrup (I used sugar free maple syrup)
3 Tbs. flavorless oil, such as vegetable or canola
1 Tb. water
Flavoring (see below)

Adjust oven rack to middle position, and heat oven to 275 degrees. Coat a 9-by-13-inch metal pan with cooking spray, and then set aside. Mix oats, wheat germ, brown sugar, salt and Extra Ingredients --except dried fruit -- in a bowl. Bring syrup, oil, water and any Flavoring indicated below to a simmer in a saucepan over low heat. Drizzle over oat mixture, and stir to combine. Pour mixture onto prepared pan. Spread out evenly and press it down flat. Bake for 30 minutes. Stir in dried fruit. Continue to bake until golden brown, about 15 minutes longer. Let cool. Granola can be stored in an airtight tin for up to two weeks.


Flavoring
1. Classic Granola
Extra Ingredients: 1/3 cup chopped walnuts, 1/3 cup sweetened flake coconut, 1/3 cup dark or golden raisins
Flavoring: 1/2 tsp. ground cinnamon
You can replace the 1/4 cup of maple syrup with 2 Tbs. each of maple syrup and molasses.

2. Crunchy Granola
Extra Ingredients: 1/4 cup slivered almonds, 1/4 cup sunflower seeds, 2 Tbs. sesame seeds, 6 Tbs. currants
Flavoring: none

3. Granola with Tropical Flavoring
Add the coconut along with the cashews and banana chips.
Extra Ingredients: 1/4 cup chopped roasted unsalted cashews, 1/4 cup chopped banana chips, 1/4 cup sweetened flake coconut, 1/4 cup chopped dried pineapple
Flavoring: 1/2 tsp. ground ginger

4. Granola with Cherries and Almonds
Extra Ingredients: 1/3 cup sliced almonds, 1/3 cup sweetened flake coconut, 1/3 cup dried cherries
Flavoring: 3/4 tsp. almond extract


Monday, July 18, 2011

Simple Smoothies - A Four-Ingredient Fix

In the mornings, we try to do quick breakfasts to get hubby out the door and off to the office. Smoothies have been a staple for us, thanks to our Magic Bullet.
When we were engaged, I wasn't convinced that this gadget was something needful, but I've changed my mind. I think it's gotten more use than any other appliance in our kitchen.
You can use whatever goodies you find in your fridge and freezer, and in 60 seconds, you've got breakfast in a cup (with a cool lid to go)! This week we had harvested a bunch of oranges from the citrus tree in our yard. Our grafted dwarf tree produces limes, lemons, oranges, and mandarin oranges. Cool, huh?

I picked almost all of the ripe oranges, so there are mostly lemons and limes today.
I squeezed 4 oranges and got about 1.5 cups of juice. 
Perfect for a couple of smoothies! Isn't my juicer cute?!? I love it. 
The ingredients and the finished product on the left.
The frozen fruit I have now from Costco has pineapple, papaya, mango, and strawberries. 

Here's what I usually add to a 
Fruit Smoothie
1/2 c. orange juice
1/2 c. plain yogurt (I used Greek style yogurt)
1/2 c. milk (any kind of milk - regular, soy, almond, etc.)
1/2 c. fruit (frozen or fresh)

If I use fresh fruit, then I would add a couple of ice cubes to make it cold. But I find it's nice to always stock your freezer with some frozen fruit, that way it's always ready for the blender.

Another smoothie I like to make is from the South Beach Diet Quick & Easy Cookbook
Almond Energy Blast
1 c. lowfat vanilla soymilk
3/4 c. plain low-fat or fat-free yogurt
6 oz. silken tofu
1/4 c. dry-roasted almonds

For this one, I have even used firm tofu and raw almonds, and it's still good. Additionally, I prefer the "original" or plain soymilk, so I use that and add a sweetener like Splenda or sugar-free vanilla syrup. If you're trying to get healthy, you can add protein powder or a little wheat germ for an extra boost.

Blend away and be blessed!